|
The parameters are grouped into panels. Some parameters have a button with the  icon, which displays a counterpart of the parameter that works only in the lights area. icon, which displays a counterpart of the parameter that works only in the lights area.
Basic
- Brightness - a parameter that increases the global brightness of the image.
- Lights Brightness - a parameter that increases the global brightness of the image in the lights area.
- Contrast - a parameter that increases the global contrast of the image.
- Lights Contrast - a parameter that increases the global contrast of the image in the lights area.
- White Point - the white point parameter of the image, adjusting the distance of the histogram from the right edge.
- Highlights Protection - a parameter that controls the overexposure effect.
- Lights - a parameter that adjusts the brightness of the lights.
- Lights Blacks - a parameter that adjusts the blacks in the lights.
- Midtones - a parameter that adjusts the brightness of the midtones.
- Midtones Blacks - a parameter that adjusts the blacks in the midtones.
- Shadows - a parameter that adjusts the brightness of the shadows.
- Blacks - a parameter that adjusts the blacks.
- Black Point - the black point parameter of the image, adjusting the distance of the histogram from the left edge.
- Sharpening - a parameter that adjusts the sharpness of the image.
|

|
Advanced
|
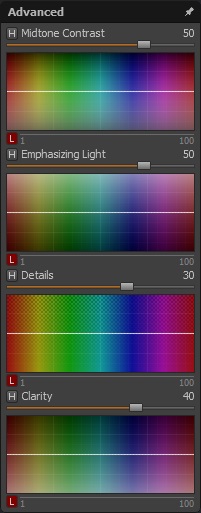
- Midtone Contrast - a parameter that adjusts the midtone contrast.
- Lights Midtone Contrast - a parameter that adjusts the midtone contrast in the lights area.
- Emphasizing Light - a parameter that adjusts how much the image is filled with light.
- Lights Emphasizing Light - a parameter that adjusts how much the image is filled with light in the lights area.
- Details - a parameter that adjusts the level of detail in the image.
- Lights Details - a parameter that adjusts the level of detail in the image in the lights area.
- Clarity - a parameter that adjusts the local contrast of the image.
- Lights Clarity - a parameter that adjusts the local contrast of the image in the lights area.
|
Color
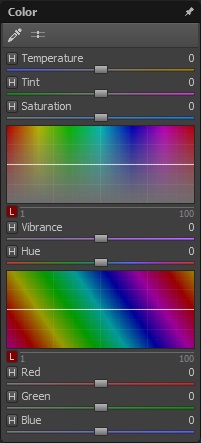
- Temperature - a white balance parameter that adjusts the temperature of the image.
- Lights Temperature - a white balance parameter that adjusts the temperature of the image in the lights area.
- Tint - a white balance parameter that adjusts the green level of the image.
- Lights Tint - a white balance parameter that adjusts the green level of the image in the lights area.
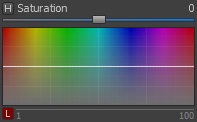
- Saturation - a parameter that adjusts the saturation of the image.
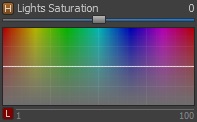
- Lights Saturation - a parameter that adjusts the saturation of the image in the lights area.
- Vibrance - a parameter that adjusts the intensity of less saturated colors.
- Lights Vibrance - a parameter that adjusts the intensity of less saturated colors in the lights.
- Hue - a parameter that adjusts the hue of colors.
- Lights Hue - a parameter that adjusts the hue of colors in the lights.
- Red - a parameter that adjusts the level of the red color.
- Lights Red - a parameter that adjusts the level of the red color in the lights.
- Green - a parameter that adjusts the level of the green color.
- Lights Green - a parameter that adjusts the level of the green color in the lights.
- Blue - a parameter that adjusts the level of the blue color.
- Lights Blue - a parameter that adjusts the level of the blue color in the lights.
|
|
The color panel is equipped with an eyedropper tool, allowing you to set the temperature and tint (white balance) parameters based on a neutral point selected in the image.
To use the eyedropper tool, click the  icon and then click a chosen point in the image, which should be neutral (gray). icon and then click a chosen point in the image, which should be neutral (gray).
When the button with the icon is active, the eyedropper tool will set the white balance parameters that work only in the lights area.
The eyedropper tool can be turned off by clicking the icon again or by right-clicking the image.
The white balance parameters can be reset by clicking the  icon. When the button with the icon is active, the white balance parameters that work only in the lights area will be reset. icon. When the button with the icon is active, the white balance parameters that work only in the lights area will be reset.
Any parameter can be reset by double-clicking it with the left mouse button.
Any parameter can be set to its default value (taken from the current preset) by right-clicking the parameter.
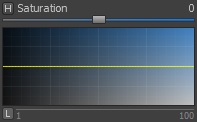
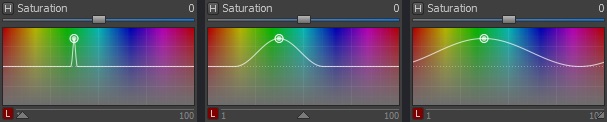
Some parameters have curve fields, allowing you to define the parameter value for individual colors and luminance values. There are three types of curve fields.
-
Allowing you to adjust the parameter value for a specific color range.
-
Allowing you to adjust the parameter value in the lights area for a specific color range (when the button with the icon is checked).
-
Allowing you to adjust the parameter value for a specific luminance range (when the button with the
 icon is checked). icon is checked).
Curve control points are added by left-clicking in the curve area. Points can be removed by right-clicking them.
Each control point has a range parameter assigned to it. For the currently selected point, this parameter is adjusted with the slider located below the curve field, or with the mouse wheel.
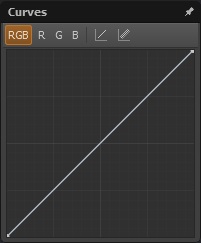
Curves
|
- RGB curve - a curve that allows you to adjust the brightness level of individual tones of the image.
- Red curve - a curve that allows you to adjust the brightness level of individual tones in the red channel.
- Green curve - a curve that allows you to adjust the brightness level of individual tones in the green channel.
- Blue curve - a curve that allows you to adjust the brightness level of individual tones in the blue channel.
|
Switching to the appropriate curve is done by clicking the [RGB], [R], [G] or [B] button.
Curve control points are added by left-clicking in the curve area. Points can be removed by right-clicking them.
To reset the current curve, click the  icon. To reset all curves, click the icon. To reset all curves, click the  icon. icon.
The base image, without any changes applied, can be previewed by pressing the right mouse button on the image.
|