|
To create a new HDR image, click the  icon located on the toolbar.
After clicking the icon, a dialog window will open in which you should select the source image or images (if the image is to be created from multiple exposures) and confirm the selection. icon located on the toolbar.
After clicking the icon, a dialog window will open in which you should select the source image or images (if the image is to be created from multiple exposures) and confirm the selection.
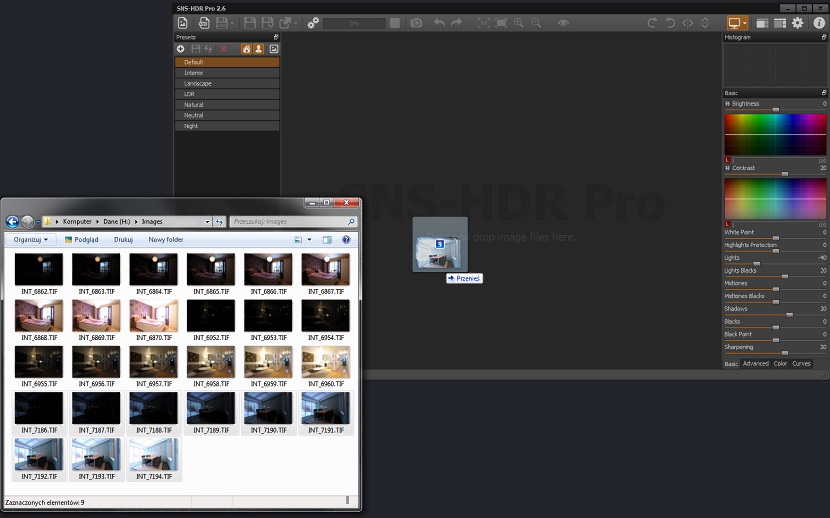
The source image files can also be dragged into the program window directly from a Windows Explorer window. To do this, open the folder containing the source images in the system and
drag the images into the SNS-HDR workspace.
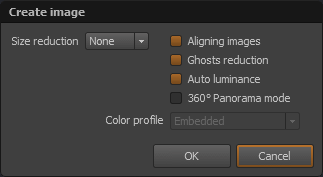
After the source images have been selected, the program will display a window in which you should set the image pre-processing parameters.
Depending on whether a single source image or several exposures have been selected, the following options will be available in the window:
- Size reduction
This option is used to reduce the size of the source images.
Setting a size reduction is recommended when the processed image can be smaller than the original and you want to speed up the image pre-processing.
Image pre-processing is time-consuming, and smaller images are processed faster. A twofold size reduction means four times faster processing.
- Image alignment
When this option is checked, the source exposures will be aligned automatically. This option is only active when creating an image from multiple exposures.
- Ghost reduction
Checking this option makes the program automatically reduce the shifts of objects between the individual exposures. Object shifts are reduced starting from the brightest exposure of the image,
so a positive side effect of this function is noise reduction in the image. This option is only active when creating an image from multiple exposures.
- Automatic luminance
When this option is checked, the program stretches the image histogram to optimally fill the entire available tonal range. Enabling this option is recommended for most images, as it makes
the black point of the generated HDR image take the value of zero and the white point the maximum value. Disabling this option is only recommended when processing HDR images that are part of a larger image, e.g. a panorama.
This ensures that all components of the larger image will have uniform brightness.
- 360° panorama mode
When this option is checked, the program takes into account that the processed image wraps around, which means that its left and right edges actually meet. Checking this option ensures that when the final image is presented in a 360° view, the seam where the image edges join will not be visible.
- Color profile
This option is only available for images saved in the RAW, OpenEXR and Radiance HDR formats. For RAW images, it allows you to specify the color space to which the RAW image will be decoded.
For images saved in the OpenEXR and Radiance HDR formats, this option allows you to indicate the color space in which the source images were saved.
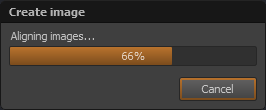
After the parameters have been confirmed, the program will begin pre-processing the image. A window will be displayed with information about the processing progress and a button to optionally cancel the operation.
When the processing operation is complete, the pre-processed image will appear in the program workspace.

An HDR image can also be created from a previously saved image in the SNSX format. To do this, click the  icon, select the file and confirm the selection,
or drag the SNSX file directly from a Windows Explorer window into the program window. icon, select the file and confirm the selection,
or drag the SNSX file directly from a Windows Explorer window into the program window.
|