|
Interface layout
The program interface consists of the toolbar (1), the presets panel (2), the masks panel (3), the histogram panel (4), the parameter panels (5), the workspace (6) and the status bar (7).
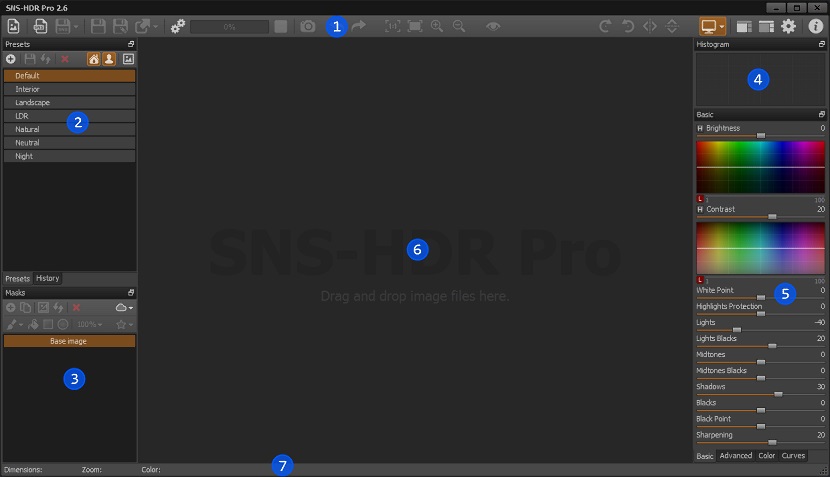
The interface layout can be configured by changing the position of the panels.
A panel can be moved by clicking its name with the left mouse button and dragging it to another location.

The interface layout can be reset to restore the default layout. To do this, click the  icon located on the toolbar. icon located on the toolbar.
Color theme
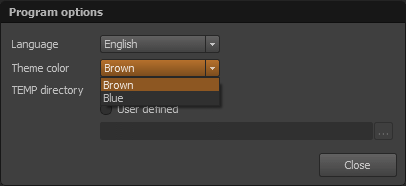
The program has two built-in color themes, which define the leading color of the interface. The color theme can be changed by clicking the program settings icon  and then selecting a theme from the list of available themes in the window that appears. and then selecting a theme from the list of available themes in the window that appears.
Workspace background brightness
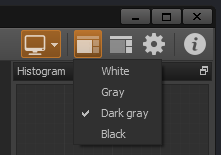
The brightness of the workspace background can be changed in the program. To do this, click the  icon and then select the desired color from the drop-down list. icon and then select the desired color from the drop-down list.
Interface language
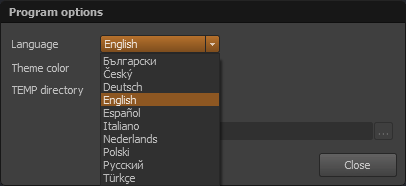
The SNS-HDR interface is available in the following languages:
- Bulgarian
- Czech
- Dutch
- English
- German
- Italian
- Polish
- Russian
- Spanish
- Turkish
The interface language can be changed by clicking the program settings icon and then selecting a language from the list of available languages in the window that appears.
Monitor color profile
SNS-HDR has a built-in color management module and fully supports monitor color profiles.
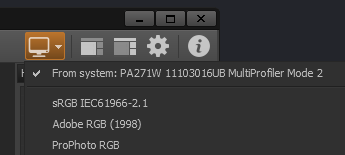
Monitor profile support is enabled by default, and the default profile is the active monitor color profile set in the operating system. The list of color profiles available in the program can be displayed by clicking the arrow
next to the  icon. The profile can be activated and deactivated by clicking the icon, or changed by selecting a profile from the drop-down list. icon. The profile can be activated and deactivated by clicking the icon, or changed by selecting a profile from the drop-down list.
The monitor profile is active when the icon is permanently highlighted.
|